Logon to BI Publisher (if not logged) and open the Report tab.
Select the Schedule link displayed below the report which you need to schedule.

On the schedule report page, select the template type and the format for the report.
Enter Employee_Location_Details-Scheduled as the Job Name, and select appropriate language and time options as per your requirements. Also, ensure that the Save Data for Republish and Save Output options are selected.

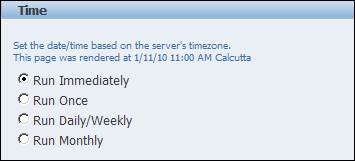
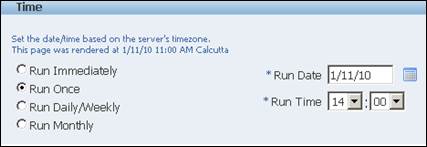
In the Time section of the scheduled report page, select any one of the four option to run the scheduled report as shown below:
Run Immediately – Runs the scheduled report immediately after scheduling the report.

Run Once – Runs the scheduled report once at the selected date and time after scheduling the report.

Run Daily/Weekly – Runs the scheduled report weekly once or daily once at the selected day of week and time. Also select the Active Start Date and End Date.

Run Monthly – Runs the scheduled report monthly once at the selected month, day and time. Also select the Active Start Date and End Date.

After selecting the option click submit which is found on the top and bottom right corner of the scheduled report page.

After submitting the scheduling process, a confirmation message can be seen along with the Report Schedules.

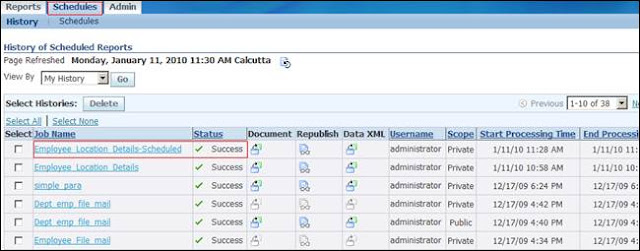
o view the history of the scheduled reports, go to the Schedules tab.
Click the History tab to view the report history. Note that the Data XML and Document columns are shown in the history table.
Here you can see the status of the report as ‘Running’. Once the report has run the status automatically changes to ‘Success’(Keep refreshing the page)
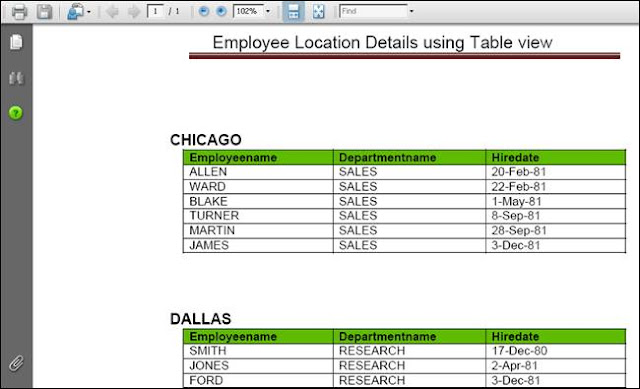
Click the icon in the Document column to see the saved report.


Comments
Post a Comment