Repository services :::
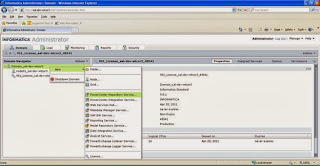
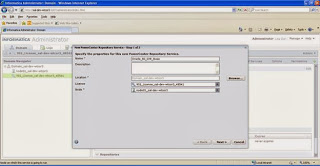
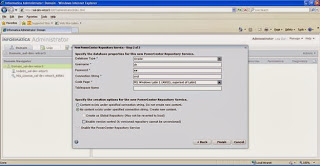
(database property , newly created user at database)
Username : sh
Password : sh
Integration services ::::
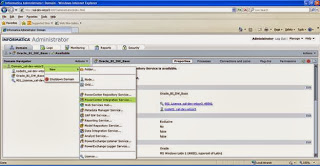
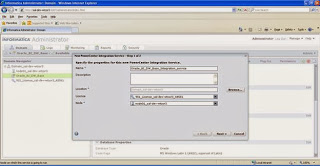
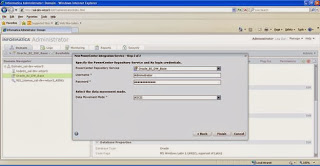
username : Administrator
Password : Administrator
This password because while creating database configuration we have assigned this integration service to the domain and so domain username and password comes here as Administrator
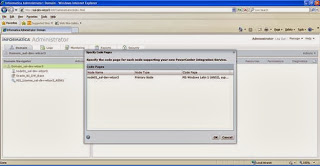
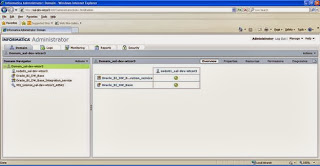
Check whether both integration service and repository services are up or not , if not then go to repository service à change the mode to à normal mode from exclusive mode
Changing from one mode to another mode, services stops or disabled or not able to up the services again, in those cases it is advisable to uninstall the complete application and re-install it (restart the machine in between).
Unistall Process
NOTE
During the installation process of informatica, if you face any issues, it is advisable to uninstall and re-install the whole informatica (Server and client).
Below are the steps
1) Stop Informatica Services
2) Uninstall Informatica Server
3) Uninstall Informatica Client
4) Delete the installation folder (Informatica installed Path – e.g. F:\Informatica)
5) Remove the instance from Path Variables
My computer à Properties à Advanced à Environment variables à under System variables
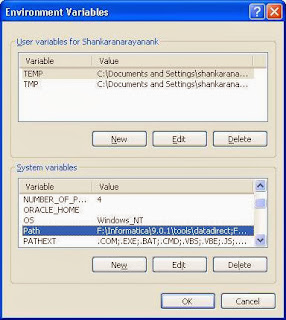
Select “Path” from System Variables àEdit à Remove informatica related paths
e.g. F:\Informatica\9.0.1\tools\datadirect;
F:\Informatica\9.0.1\clients\tools\datadirect;
F:\Informatica\9.0.1\clients\PowerCenterClient\client\bin;
F:\Informatica\9.0.1\server\bin;
From this Path
F:\Informatica\9.0.1\tools\datadirect;F:\Informatica\9.0.1\clients\tools\datadirect;C:\oracleDB\product\11.2.0\dbhome_1\bin;%SystemRoot%\system32;%SystemRoot%;%SystemRoot%\System32\Wbem;C:\Program Files\Intel\DMIX;C:\WINDOWS\system32\WindowsPowerShell\v1.0;C:\WINDOWS\system32\gs\gs7.05\bin;F:\MiddlewareHome\Oracle_BI1\products\Essbase\EssbaseServer\bin;F:\MiddlewareHome\Oracle_BI1\bin;F:\MiddlewareHome\Oracle_BI1\opmn\bin;F:\MiddlewareHome\Oracle_BI1\opmn\lib;F:\MiddlewareHome\Oracle_BI1\perl\bin;F:\Informatica\9.0.1\clients\PowerCenterClient\client\bin;F:\Informatica\9.0.1\server\bin
Finally the Path should look like below
C:\oracleDB\product\11.2.0\dbhome_1\bin;%SystemRoot%\system32;%SystemRoot%;%SystemRoot%\System32\Wbem;C:\Program Files\Intel\DMIX;C:\WINDOWS\system32\WindowsPowerShell\v1.0;C:\WINDOWS\system32\gs\gs7.05\bin;F:\MiddlewareHome\Oracle_BI1\products\Essbase\EssbaseServer\bin;F:\MiddlewareHome\Oracle_BI1\bin;F:\MiddlewareHome\Oracle_BI1\opmn\bin;F:\MiddlewareHome\Oracle_BI1\opmn\lib;F:\MiddlewareHome\Oracle_BI1\perl\bin
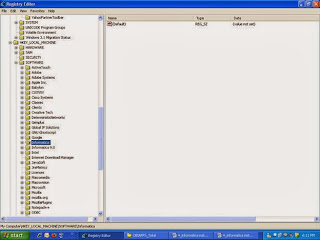
6) Start à Run à Type regedit à Remove the Informatica and informatica 9.0 folders from the registry.
7.) Restart the system
==============================================
Post creation of integration services
=================================
4.6.5.1 Restoring the Pre-built Informatica Repository for Environments in English (Pg 90-91)
You use the Restore option in Informatica Administrator to load the pre-built Oracle_BI_DW_Base repository (or the Oracle_BI_DW_Teradata repository in a Teradata environment).
To load the pre-built Oracle_BI_DW_Base.rep or Oracle_BI_DW_Teradata.rep repository into Informatica
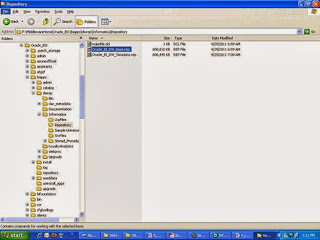
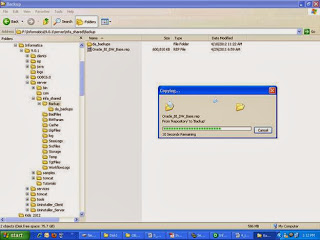
Copy the file Oracle_BI_DW_Base.rep (or Oracle_BI_DW_Teradata.rep if your Oracle Business Analytics Warehouse is on Teradata)
FROM: ORACLE_HOME\biapps\dwrep\Informatica\Repository
TO: INFA_HOME\server\infa_shared\Backup
INFA_HOME – Path àF:\Informatica\9.0.1
2. In Informatica Administrator, select the Repository Service that was created in the
procedure in Section 4.6.3, "Creating the Informatica Repository Service."
For more information about logging into Informatica Administrator, see
Section A.8, "How to Log Into Informatica Administrator."
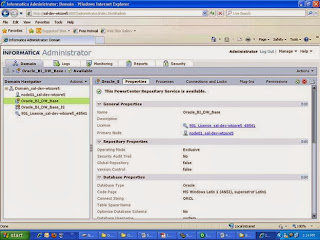
3. In the General Properties area of the Properties tab, make sure the OperatingMode
value is Exclusive.
To change the OperatingMode value, click Edit, and then select a new value from
the drop-down list. Click OK to exit edit mode.
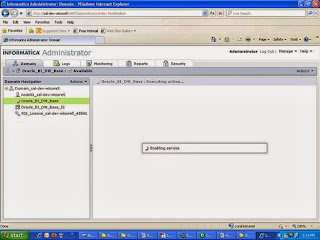
4. In the Actions menu at the top right-hand side, choose Actions, then Repository
Contents, then Delete Contents.
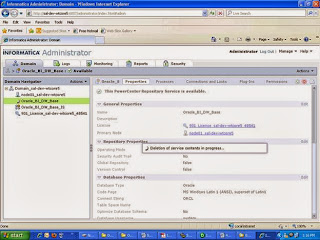
5. At the Delete Contents for <repository name> dialog box, enter the repository
username and password (for example, Administrator\Administrator), then click
OK.
6. In the Actions menu at the top right-hand side, choose Actions, then Repository
Contents, then Restore.
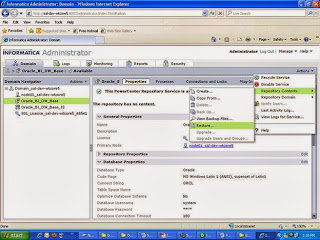
7. At the Restore Contents for <repository name> dialog, enter the repository
username and password (for example, Administrator\Administrator), then click
OK.
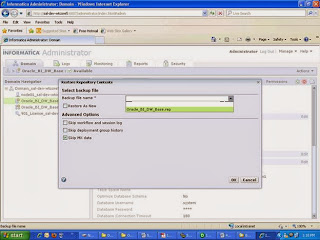
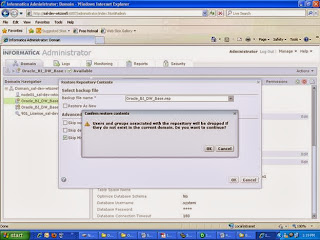
Certain things if you have created for informatica already it will delete and will restore current informatica repository
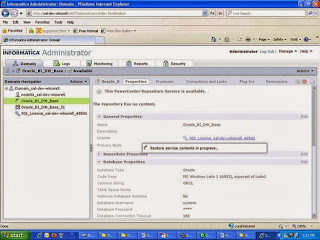
8. Choose Actions > Restore Contents.
9. At the Restore Contents dialog, select Oracle_BI_DW_Base.rep (or Oracle_BI_DW_Teradata.rep for Teradata installations) from the Select Backup File drop-down list.
10. Select the Restore as New check box.
11. Click OK to start the restore process.
12. When the restore process is complete, click Close (or click Save first to save the
logging information).
When the restore is complete (the process typically takes approximately ten to
twenty minutes), you will see a 'Success' message.
13. When a repository is restored, the repository becomes a standalone repository.
After restoring the repository, you need to promote it to a global repository.
For instructions, see the topic titled, "Promoting a Local Repository to a Global
Repository," in "Chapter 8: Managing the Repository," in Informatica PowerCenter Administrator Guide.
14. Change the OperatingMode value to Normal.
a. Go to the Properties tab.
b. In the General Properties area, click Edit.
c. Click the OperatingMode drop-down list, and select Normal.
Note: if you do not set the Operating Mode to Normal, the Integration Service will
not restart.
15. If prompted, enter the repository username and password.
Copying Source Files and Lookup Files (Pg 95-96)
You need to copy source files and lookup files from the Oracle BI Applications installation directory to the Informatica directory on the Informatica PowerCenter Services machine.
Note: The following instructions assume the default Informatica directory locations for source and lookup files.
ORACLE_HOME – Path àF:\MiddlewareHome\Oracle_BI1
INFA_HOME – Path àF:\Informatica\9.0.1
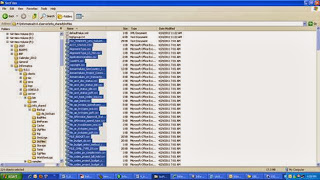
1. Copy the source files from the folder “SrcFiles”
FROM F:\MiddlewareHome\Oracle_BI1\biapps\dwrep\Informatica\SrcFiles
TO F:\Informatica\9.0.1\server\infa_shared\SrcFiles (224 objects copied)
Before Pasting
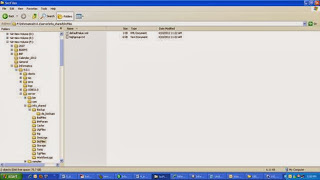
After Pasting
2. Copy the Lookup files from the folder LkpFiles
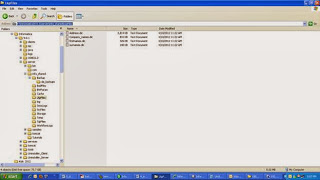
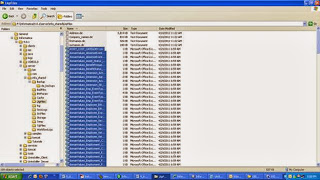
From: ORACLE_HOME\biapps\dwrep\Informatica\LkpFiles
Path à F:\MiddlewareHome\Oracle_BI1\biapps\dwrep\Informatica\LkpFiles
To : INFA_HOME\server\infa_shared\LkpFiles.
Path à F:\Informatica\9.0.1\server\infa_shared\LkpFiles (189 objects copied)
Before Pasting
After Pasting
Setting PowerCenter Integration Services Relaxed Code Page Validation (Pg-96)
PowerCenter Integration Services for Oracle BI Applications must be configured for relaxed code page validation.
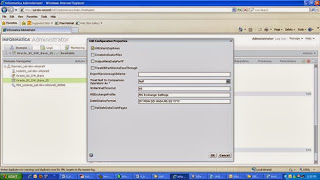
To configure Informatica PowerCenter Integration Services for relaxed code page validation
1. Log into Informatica Administrator.
2. Select the Integration Service.
3. Select the Properties tab.
4. In the Configuration Properties area, click Edit.
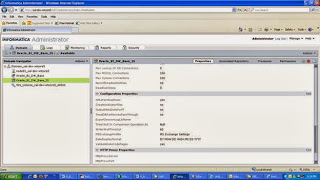
Click Edit
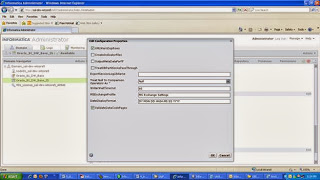
5. Deselect the 'ValidateDataCodePages' check box.
Setting PowerCenter Integration Services Custom Properties (Pg 96-97)
To set Informatica PowerCenter Integration Services Custom Properties
1. In Informatica Administrator, select the Integration Service.
2. Click the Properties tab.
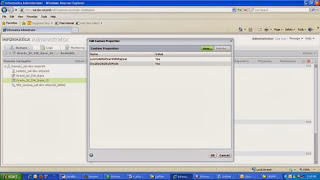
3. In the Custom Properties area,
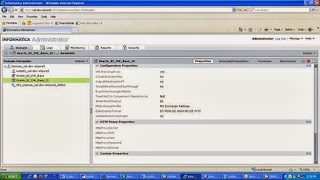
click Edit.
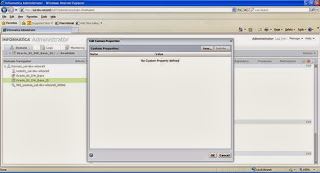
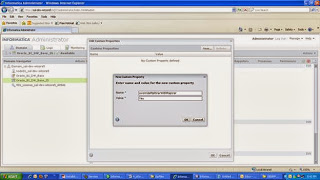
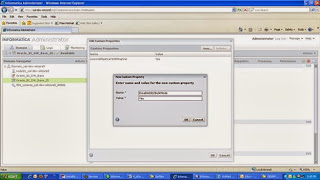
Use the New option to display the New Custom Property dialog, and add the following Custom Properties:
Name : overrideMpltVarWithMapVar
Value : Yes
Name : DisableDB2BulkMode
Value : Yes
5. Click OK to save the details.
6. Make sure that the Integration Service and Repository Service that you created during the Informatica PowerCenter installation are running.
Creating the Repository Administrator User in the Native Security Domain (Pg 97-99)
To use the default Administrator user in the native security domain
1. Log in to the PowerCenter Administration Console as Administrator.
2. Display the Security tab by clicking the Configure Security icon in the top, right corner of the Informatica Administrator work area.
3. In the Users area, expand the Native directory and select Administrator.
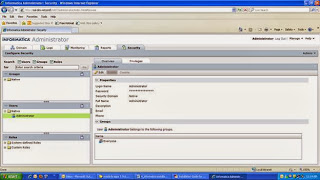
Note: Do not select an existing user from an LDAP domain.
4. Display the Privileges tab
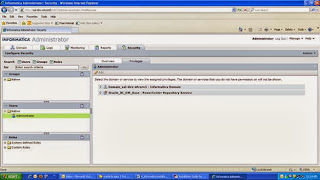
5. Make sure that the correct Domain and Repository Service are selected.
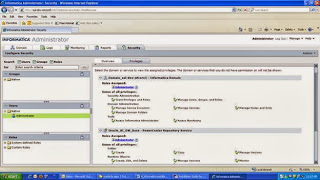
To create a new Repository Administrator defined in the native security domain
1. Log in to the PowerCenter Administration Console as Administrator.
2. Display the Security tab by clicking the Configure Security icon in the top, right corner of the Informatica Administrator work area.
3. In the Users area, click Actions, then Create User to display the Create User dialog.
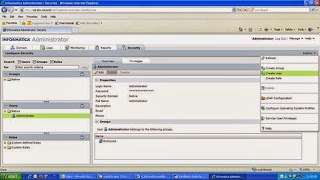
Note: Do not create this user in an LDAP domain.
4. Use the Create User dialog to specify the user details, then click OK.
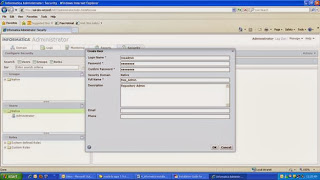
Login Name : repadmin
Password : repadmin
Full Name : Rep_Admin
6. In the Users area, select the new user, display the Privileges tab
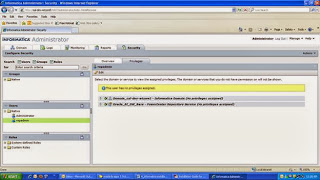
7. then click Edit to display the Edit Roles and Privileges dialog.
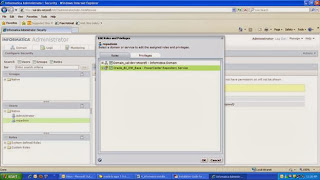
Use the Roles tab and Privileges tab to select the appropriate Domain and Repository Service
Check the Roles you want to assign to this user
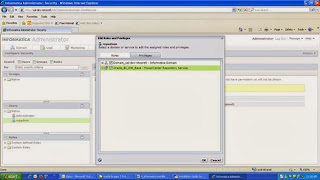
Check the privileges you want to assign to this user
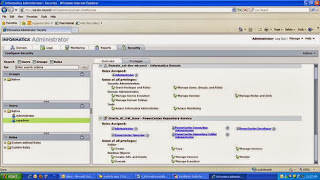
6.. Final Summary
Password : sh
Integration services ::::


username : Administrator
Password : Administrator
This password because while creating database configuration we have assigned this integration service to the domain and so domain username and password comes here as Administrator


Check whether both integration service and repository services are up or not , if not then go to repository service à change the mode to à normal mode from exclusive mode
Changing from one mode to another mode, services stops or disabled or not able to up the services again, in those cases it is advisable to uninstall the complete application and re-install it (restart the machine in between).
Unistall Process
NOTE
During the installation process of informatica, if you face any issues, it is advisable to uninstall and re-install the whole informatica (Server and client).
Below are the steps
1) Stop Informatica Services
2) Uninstall Informatica Server
3) Uninstall Informatica Client
4) Delete the installation folder (Informatica installed Path – e.g. F:\Informatica)
5) Remove the instance from Path Variables
My computer à Properties à Advanced à Environment variables à under System variables

Select “Path” from System Variables àEdit à Remove informatica related paths
e.g. F:\Informatica\9.0.1\tools\datadirect;
F:\Informatica\9.0.1\clients\tools\datadirect;
F:\Informatica\9.0.1\clients\PowerCenterClient\client\bin;
F:\Informatica\9.0.1\server\bin;
From this Path
F:\Informatica\9.0.1\tools\datadirect;F:\Informatica\9.0.1\clients\tools\datadirect;C:\oracleDB\product\11.2.0\dbhome_1\bin;%SystemRoot%\system32;%SystemRoot%;%SystemRoot%\System32\Wbem;C:\Program Files\Intel\DMIX;C:\WINDOWS\system32\WindowsPowerShell\v1.0;C:\WINDOWS\system32\gs\gs7.05\bin;F:\MiddlewareHome\Oracle_BI1\products\Essbase\EssbaseServer\bin;F:\MiddlewareHome\Oracle_BI1\bin;F:\MiddlewareHome\Oracle_BI1\opmn\bin;F:\MiddlewareHome\Oracle_BI1\opmn\lib;F:\MiddlewareHome\Oracle_BI1\perl\bin;F:\Informatica\9.0.1\clients\PowerCenterClient\client\bin;F:\Informatica\9.0.1\server\bin
Finally the Path should look like below
C:\oracleDB\product\11.2.0\dbhome_1\bin;%SystemRoot%\system32;%SystemRoot%;%SystemRoot%\System32\Wbem;C:\Program Files\Intel\DMIX;C:\WINDOWS\system32\WindowsPowerShell\v1.0;C:\WINDOWS\system32\gs\gs7.05\bin;F:\MiddlewareHome\Oracle_BI1\products\Essbase\EssbaseServer\bin;F:\MiddlewareHome\Oracle_BI1\bin;F:\MiddlewareHome\Oracle_BI1\opmn\bin;F:\MiddlewareHome\Oracle_BI1\opmn\lib;F:\MiddlewareHome\Oracle_BI1\perl\bin
6) Start à Run à Type regedit à Remove the Informatica and informatica 9.0 folders from the registry.

7.) Restart the system
==============================================
Post creation of integration services
=================================
4.6.5.1 Restoring the Pre-built Informatica Repository for Environments in English (Pg 90-91)
You use the Restore option in Informatica Administrator to load the pre-built Oracle_BI_DW_Base repository (or the Oracle_BI_DW_Teradata repository in a Teradata environment).
To load the pre-built Oracle_BI_DW_Base.rep or Oracle_BI_DW_Teradata.rep repository into Informatica
Copy the file Oracle_BI_DW_Base.rep (or Oracle_BI_DW_Teradata.rep if your Oracle Business Analytics Warehouse is on Teradata)
FROM: ORACLE_HOME\biapps\dwrep\Informatica\Repository
TO: INFA_HOME\server\infa_shared\Backup
INFA_HOME – Path àF:\Informatica\9.0.1


2. In Informatica Administrator, select the Repository Service that was created in the
procedure in Section 4.6.3, "Creating the Informatica Repository Service."
For more information about logging into Informatica Administrator, see
Section A.8, "How to Log Into Informatica Administrator."
3. In the General Properties area of the Properties tab, make sure the OperatingMode
value is Exclusive.
To change the OperatingMode value, click Edit, and then select a new value from
the drop-down list. Click OK to exit edit mode.


4. In the Actions menu at the top right-hand side, choose Actions, then Repository
Contents, then Delete Contents.

5. At the Delete Contents for <repository name> dialog box, enter the repository
username and password (for example, Administrator\Administrator), then click
OK.
6. In the Actions menu at the top right-hand side, choose Actions, then Repository
Contents, then Restore.

7. At the Restore Contents for <repository name> dialog, enter the repository
username and password (for example, Administrator\Administrator), then click
OK.


Certain things if you have created for informatica already it will delete and will restore current informatica repository

8. Choose Actions > Restore Contents.
9. At the Restore Contents dialog, select Oracle_BI_DW_Base.rep (or Oracle_BI_DW_Teradata.rep for Teradata installations) from the Select Backup File drop-down list.
10. Select the Restore as New check box.
11. Click OK to start the restore process.
12. When the restore process is complete, click Close (or click Save first to save the
logging information).
When the restore is complete (the process typically takes approximately ten to
twenty minutes), you will see a 'Success' message.
13. When a repository is restored, the repository becomes a standalone repository.
After restoring the repository, you need to promote it to a global repository.
For instructions, see the topic titled, "Promoting a Local Repository to a Global
Repository," in "Chapter 8: Managing the Repository," in Informatica PowerCenter Administrator Guide.
14. Change the OperatingMode value to Normal.
a. Go to the Properties tab.
b. In the General Properties area, click Edit.
c. Click the OperatingMode drop-down list, and select Normal.
Note: if you do not set the Operating Mode to Normal, the Integration Service will
not restart.
15. If prompted, enter the repository username and password.
Copying Source Files and Lookup Files (Pg 95-96)
You need to copy source files and lookup files from the Oracle BI Applications installation directory to the Informatica directory on the Informatica PowerCenter Services machine.
Note: The following instructions assume the default Informatica directory locations for source and lookup files.
ORACLE_HOME – Path àF:\MiddlewareHome\Oracle_BI1
INFA_HOME – Path àF:\Informatica\9.0.1
1. Copy the source files from the folder “SrcFiles”
FROM F:\MiddlewareHome\Oracle_BI1\biapps\dwrep\Informatica\SrcFiles
TO F:\Informatica\9.0.1\server\infa_shared\SrcFiles (224 objects copied)
Before Pasting

After Pasting

2. Copy the Lookup files from the folder LkpFiles
From: ORACLE_HOME\biapps\dwrep\Informatica\LkpFiles
Path à F:\MiddlewareHome\Oracle_BI1\biapps\dwrep\Informatica\LkpFiles
To : INFA_HOME\server\infa_shared\LkpFiles.
Path à F:\Informatica\9.0.1\server\infa_shared\LkpFiles (189 objects copied)
Before Pasting

After Pasting

Setting PowerCenter Integration Services Relaxed Code Page Validation (Pg-96)
PowerCenter Integration Services for Oracle BI Applications must be configured for relaxed code page validation.
To configure Informatica PowerCenter Integration Services for relaxed code page validation
1. Log into Informatica Administrator.
2. Select the Integration Service.
3. Select the Properties tab.
4. In the Configuration Properties area, click Edit.

Click Edit

5. Deselect the 'ValidateDataCodePages' check box.

Setting PowerCenter Integration Services Custom Properties (Pg 96-97)
To set Informatica PowerCenter Integration Services Custom Properties
1. In Informatica Administrator, select the Integration Service.
2. Click the Properties tab.
3. In the Custom Properties area,

click Edit.

Use the New option to display the New Custom Property dialog, and add the following Custom Properties:
Name : overrideMpltVarWithMapVar
Value : Yes

Name : DisableDB2BulkMode
Value : Yes

5. Click OK to save the details.

6. Make sure that the Integration Service and Repository Service that you created during the Informatica PowerCenter installation are running.
Creating the Repository Administrator User in the Native Security Domain (Pg 97-99)
To use the default Administrator user in the native security domain
1. Log in to the PowerCenter Administration Console as Administrator.
2. Display the Security tab by clicking the Configure Security icon in the top, right corner of the Informatica Administrator work area.
3. In the Users area, expand the Native directory and select Administrator.

Note: Do not select an existing user from an LDAP domain.
4. Display the Privileges tab

5. Make sure that the correct Domain and Repository Service are selected.

To create a new Repository Administrator defined in the native security domain
1. Log in to the PowerCenter Administration Console as Administrator.
2. Display the Security tab by clicking the Configure Security icon in the top, right corner of the Informatica Administrator work area.
3. In the Users area, click Actions, then Create User to display the Create User dialog.

Note: Do not create this user in an LDAP domain.
4. Use the Create User dialog to specify the user details, then click OK.

Login Name : repadmin
Password : repadmin
Full Name : Rep_Admin
6. In the Users area, select the new user, display the Privileges tab

7. then click Edit to display the Edit Roles and Privileges dialog.
Use the Roles tab and Privileges tab to select the appropriate Domain and Repository Service
Check the Roles you want to assign to this user

Check the privileges you want to assign to this user

6.. Final Summary

Comments
Post a Comment