DAC
Administration Terminology and Icons
Task
Phase: A logical grouping of similar tasks. The phases are
assigned priority values (low to high). When tasks within different phases have
the same table dependencies, the phase with the lowest priority value is given
preference in the execution plan order.
The phase priority value
also helps drive proper data warehouse extraction. The proper BI Application
execution plan order is extract fact->extract dimension->load
dimension->load fact.
Task
Physical Folders: Folders in the Informatica repository that
contain Informatica objects. The names of these folders are usually unreadable
and not user friendly.
Task
Logical Folder: Another name for the Informatica task
physical folders. These names are more user friendly than the names of these folders
in the task physical folders. Common names are Extract, Custom Extract, Load,
Custom Load, etc...
Logical
Data Source: Identifies a task’s source and target table
connection information. The Logical Data Source becomes a parameter value,
which passes the connection information on to Informatica’s Integration
Service.
Index/Table/Task
Actions: User-defined SQL commands that are assigned to
indices, tables or tasks. Actions can be used to change index drop or create
scripts; table analyze or truncate properties; and task success, restart and
failure commands. (not covered in this course)

User
Roles: There are three roles a user can be assigned to:
Administrator, Developer and Operator. Securities are assigned as below based
on the user role.

Import/Export
Categories: Categories are used during the
import/export process to import/export select views and properties.
Logical
• Design View
• Database Connection
Information
Run
Time
• Execute View
System
• Setup View w/o Passwords
User
Data
• Users
Overwrite
log file
•
Creates new log file
Plug-in
Icon: The icon will change colors as the DAC server changes
status.
• Red – Server is stopped
• Yellow – Server is
running, but idle
• Green – Server is
running an execution plan
Functions
of the DAC Administrator
1. To Configure Users
2. To Import/Export the
DAC Repository
3. To Manage the Source
System Container
4. To Define Task Phases
5. To Define Task Physical
Folders
6. To Define Task Logical
Folders
7. To Define Logical Data
Sources
8. To Configure the DAC
Server and Email Properties
9. To Start and Stop the
DAC Server
10. To Create Data
Warehouse Tables
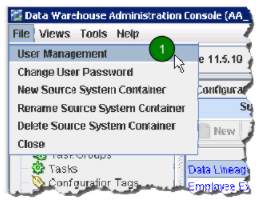
To
Configure Users:
1.Select “User Management”
in the File menu.
2.Click on “New” to create
a new DAC user. Enter the new name and password.

3.Define the role of the
user by clicking on the icon.

To
Import/Export the DAC Repository:
1.Select the “Import”
option in the Tools -> DAC Repository Management.

2.Change the import/export
folder location, if necessary.

3.Select the appropriate
categories (views).

4.Select the applications
(source system containers) to import.
5.To export the
repository, select the export option in the Tools -> DAC Repository Management
and perform steps 2 – 4.

To
Manage Source System Containers:
1.Select the “New Source
System Container” option in the File menu.

2.Enter a unique new
container id and name.

To
Define Task Phases:
1.Select the “Task Phases”
option in the Tools -> Seed Data menu.

2.Create, modify and
delete the priority values.

To
Define Task Logical Folders:
1.Select the “Task Logical
Folders” option in the Tools -> Seed Data menu.

2.Create, modify, and
delete the logical folder.

To
Define Task Physical Folders:
1.Select the “Task
Physical Folders” option in the Tools -> Seed Data menu.

2.Create, modify, and
delete physical folders and instance priority.

To
Define Logical Data Sources:
1.Select the “Logical Data
Sources” option in the Tools -> Seed Data menu.

2.Create, modify, and
delete logical data sources.

To
Configure the DAC Server and Email properties:
1.Select the “DAC Server
Setup” option in the Tools -> DAC Server Management menu.

2.Enter in the DAC
Repository credentials or click on the Populate from preconfigured client connection...
button in the “Repository Connection Information” tab.

3.From the “Email
Configuration” tab, enter the user name, password, email server, email server
port, and email address.

To
Start and Stop the DAC Server:
1.To start the Server, locate the install directory for DAC, double click on “startserver.bat”.

2.To stop the DAC server,
in the same install directory, double click on “stopserver.bat”.

To
Create Data Warehouse Tables:
1.Click on Tools -> ETL
Management -> Configure.

2.In the pop-up menu,
select the correct source and target database platforms.
3.Check the box next to Create/Upgrade Data Warehouse Tables.

4.Enter the source system
container, table owner, password, ODBC data source and table space for the
target tables. Check the box if the source system data is unicode.


Comments
Post a Comment